Well things happened a lot quicker than I expected and the model is now ready for the road:
One thing I will have to remember for the next kit I build from Railmotor Models is that the decals are a bit of a pain. The large VR logos started coming apart when I tried sliding them off the backing paper. The smaller decals I didn't have a problem with.
The next planned job is to finish some Z vans for a client.
Friday, 18 August 2017
Friday, 11 August 2017
What a load of Phosphate!
Between 1974-78 the Victorian Railways introduced a series
of hopper wagons of the same basic construction but featured different discharge
doors and 5 featured closed roofs. The JPF wagon was a class of 10 built to carry
phosphate (hence the ‘P’ in the code). The other types were JAF (Soda Ash), JBF
(Briquettes), JCX (Cement), JDX (Dolomite) JSF (Sand), and JQF (Quarry). They
received 4-letter coding in 1979.
This kit is from the Railmotor Models range. It was a prize
won at the Morwell Exhibition back in June (and I’ll take this opportunity to
thank the person who passed the kit on to me as they did not want it). This kit
was going to sit in the stockpile of other kits awaiting assembly but having
completed the HZB wagon (as seen a couple of posts back) I decided to bring it
forward in the que as I had most of the bits I needed on hand already. About
the only extra items I needed was a pair of Steam Era Models XSC Silver Spring
bogies. Assembly has taken about a week, usually done at night when there is
stuff all on the TV worth watching. It was just going to be the basic wagon
with shunter’s steps and a handrail fitted at each end. But when I researched
the prototype and found a couple of good pictures plus a diagram on Mark Bau’s
Victorian Railways website, I decided it was worth adding a bit more detail. So
it has the handrails at the top of the ladder, some piping that appears on the
handbrake side along the discharge chutes as well as the rods for the door
slides, extra steps on the sides and ends and the linkage for the grade
control. Kadee #158 couplers are fitted as well:
The model will have the usual test run at the local model
railway club, then prepared for painting which might take a week or two depending
on weather and time available.
Tuesday, 8 August 2017
Two B...or not Two B
Well I'm not quite ready to post a picture or two of the next build project. But I thought I would cover something else in the motive power department:
This Lima B-class came into my workshop to have a pilot re-attached plus a bit of a service. At some stage it has been converted from the old 'dunny seat' couplers to Kadees while using the original Lima pilot. The Lima B-class was first introduced onto the market in the early 1990s following the success of the Lima S-class (not the NSW 44-class repaint version by the way). Until this model came along it was common for modellers to buy two S-class and use the Bulldog cab off one to stick on the other end (after chopping the...errr...'B' end off first). So what became of the leftover bits? Well some made a...errr... 'B' unit by sticking the remaining rear end chopped off onto the other body. Unfortunately I don't have a photo to show this but it was a good way to use the leftover parts.
So in this post I thought I would do a quick comparison of the Lima B-class against the newer Auscision model which came out in 2009:
Now there is no question that the Auscision model is more detailed and has a superior mechanism to the ringfield motor used on the Lima model. It also caters for the DCC market by having a 8-pin plug to fit a plug-and-play decoder (though this may change to the 21-pin arrangement going by what Auscision have done with the recent re-run of the A-class). Anyway enough of the sales pitch, here is some pretty pictures of the pair together:
As happy as I am with my Auscision model (except for the grills coming off as it is from the very first batch made) I would make room for the Lima one in my fleet to show off where the hobby was 25 years ago compared to the offering today. Another comparison could be made with the brass B-class models produced by Alco Models in the 1980s and the one produced by Precision Scale Models in 1992. One day maybe.....
This Lima B-class came into my workshop to have a pilot re-attached plus a bit of a service. At some stage it has been converted from the old 'dunny seat' couplers to Kadees while using the original Lima pilot. The Lima B-class was first introduced onto the market in the early 1990s following the success of the Lima S-class (not the NSW 44-class repaint version by the way). Until this model came along it was common for modellers to buy two S-class and use the Bulldog cab off one to stick on the other end (after chopping the...errr...'B' end off first). So what became of the leftover bits? Well some made a...errr... 'B' unit by sticking the remaining rear end chopped off onto the other body. Unfortunately I don't have a photo to show this but it was a good way to use the leftover parts.
So in this post I thought I would do a quick comparison of the Lima B-class against the newer Auscision model which came out in 2009:
Now there is no question that the Auscision model is more detailed and has a superior mechanism to the ringfield motor used on the Lima model. It also caters for the DCC market by having a 8-pin plug to fit a plug-and-play decoder (though this may change to the 21-pin arrangement going by what Auscision have done with the recent re-run of the A-class). Anyway enough of the sales pitch, here is some pretty pictures of the pair together:
As happy as I am with my Auscision model (except for the grills coming off as it is from the very first batch made) I would make room for the Lima one in my fleet to show off where the hobby was 25 years ago compared to the offering today. Another comparison could be made with the brass B-class models produced by Alco Models in the 1980s and the one produced by Precision Scale Models in 1992. One day maybe.....
Monday, 7 August 2017
Brake block wagon, ready for the road
Just on a month since I purchased this kit, it has been
painted and decaled, ready for traffic:
The railways had a bogie wagon that was modified for the
same purpose and maybe it will be a project for the future. It differed from
the 4-wheel version in that it had a raised section in the middle and the floor
sloped towards the ends and was coded VZBF in V/line service. In typical Victorian Railways fashion and like the HZB
it was modified from an existing wagon the railways no longer needed in regular
traffic:
Photo from Norm Bray's Flickr site: https://www.flickr.com/photos/60901191@N08/
The next project has already been started and a blog post on that is coming sometime later in the week.
Friday, 14 July 2017
Taking a brake….and blocking up
In my previous blog post I showed some of my kit purchases
from the Stawell exhibition and noted that at least one of these kits was
likely to get done quicker on the basis that I already had parts to complete
it. Funny thing is I opted to go with the smaller wagon of the two which
required the purchase of a Steam Era Models GY underframe. The kit I’m
referring to is shown below:
The HZB wagon was used by the Victorian Railways to
transport brake blocks from Newport Workshops (where they were cast) to the
country depots to fit to wagons and carriages locally (as oppose to sending
said wagon or carriage to Newport to be fitted). They also carried scrap as
required. The HZB wagons were converted from GY/HY wagons and at least 3 of the
21 wagons have survived into preservation including HZB292 at Daylesford.
The kit is from Lyndon Trains and only requires a Steam Era Models GY underframe kit (plus the etched handbrake gear) and couplers. Lyndon
supplies shunter’s steps, tie-down loops and wire to make handrails. It took me
a couple of nights to get the model to this stage, ready for painting:
When finished I will have another item of interest to run in
my fleet.
Monday, 10 July 2017
The haul from Stawell
While getting over the weekend activities at the Stawell Exhibition helping operate 'Town & Country', I thought I would put up a picture of my purchases which included a number of wagon kits:
As you can see, Lyndons Trains did ok as I ended up getting a early build NN/VZMA ballast wagon, HZB departmental wagon and some KCC cement containers. The Section 8 water tank and the model truck were prizes at the dinner held for exhibitors and will more than likely find a home on my future planned layout. Of the wagons I have bits already on hand to do the ballast wagon but this might have to wait in line for other projects to clear the workbench. But if the weather isn't much chop for painting it might happen sooner.
Tuesday, 2 May 2017
Save the coal
Unfortunately in early April the Bendigo Model Railroaders (BMR) lost it's long-time President Barry Pianta after a couple of years suffering health issues. Barry was a founding member of the club back in 1975:
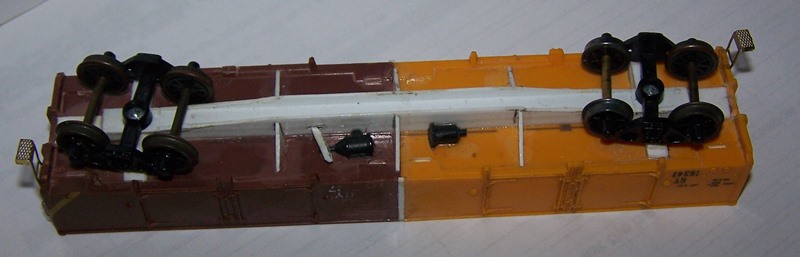
Barry left a number of items to the club, including many of his projects that never got finished (some were not even started as far as kits go). Members were able to have anything they might have a use for. One of these items is this E wagon, made up from two old Lima GY wagons cut and spliced together with suitable underframe detail added:
Deciding that another such open wagon could be accommodated in my running fleet I have taken this project on. First job was to fit some couplers and some suitable bogies for a more modern application. Both were not a problem as I already had a spare set of couplers and as for the bogies:
So what is the plan? Well this model will be finished as Steamrail's coal wagon VOAF9. It will be painted wagon red and stenciled for this traffic (when I source decals for this). I will also load the wagon up with coal bags just like the prototype has been since the early 1990s.
Barry left a number of items to the club, including many of his projects that never got finished (some were not even started as far as kits go). Members were able to have anything they might have a use for. One of these items is this E wagon, made up from two old Lima GY wagons cut and spliced together with suitable underframe detail added:
Deciding that another such open wagon could be accommodated in my running fleet I have taken this project on. First job was to fit some couplers and some suitable bogies for a more modern application. Both were not a problem as I already had a spare set of couplers and as for the bogies:
So what is the plan? Well this model will be finished as Steamrail's coal wagon VOAF9. It will be painted wagon red and stenciled for this traffic (when I source decals for this). I will also load the wagon up with coal bags just like the prototype has been since the early 1990s.
Subscribe to:
Posts (Atom)